Showing posts with label cooking. Show all posts

Monday, 28 August 2017

Sticky Toffee Cake and a Bake Off

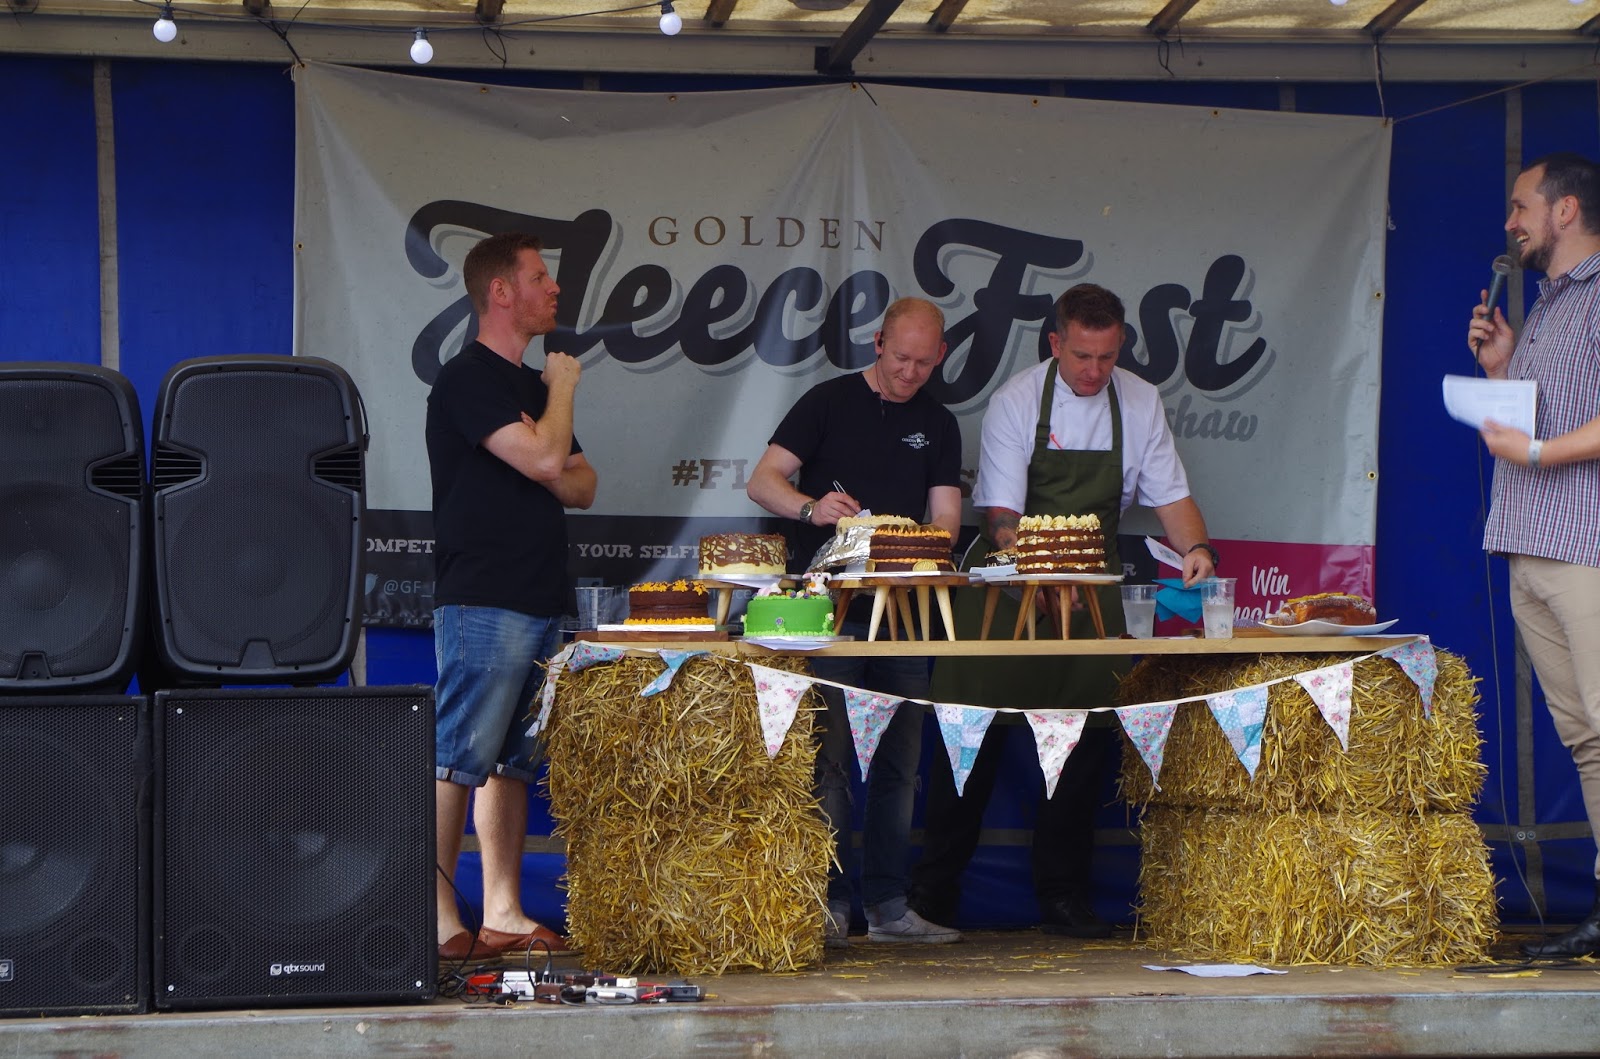
The Golden Fleece hosted the third annual Fleece Fest this bank holiday weekend and that meant it was time once again for the Great Birkenshaw Bake Off. 


My offering this year was to be a Sticky Toffee Cake and I set off down to pub full of hope yet these were soon to be dashed as cake upon cake arrived each looking better than the next. 


There seemed to be a common feeling in the air between this year’s bakers as similar recipe ideas kept cropping up, there were two chocolate orange cakes and even another sticky toffee cake to accompany mine. I knew I should have done that raspberry and pistachio cake that I had been planning.


Are you not going to take the bloody foil off?


There was new marking system in place this year, one which seemed to favour presentation and so although I had upped my decoration game this year, the piping even worked this time,  my cake still came up short.


Third places went to the Sticky Toffee Pudding cake, second to the Terry’s Chocolate Orange cake and the winning cake was the very elaborate fondant icing decorated ‘Down The Rabbit Hole Cake.’ 

As I was accompanied this year by both my mother and grandmother we took it up on ourselves to buy a slice of each of these winning cakes to take home to try. It turns out that I am a very harsh critic. 

I think he's trying mine
Does that look like a happy face? I can't tell


To make your own Sticky Toffee Cake you will need:

For the cake:

400g prunes/dates
500ml tea
250g butter
400g sugar
6 eggs
1tsp bicarb 
4tbsp golden syrup
500g self-raising flour

Start by preheating the oven to 180 degrees c and lining a deep cake dish with greaseproof paper. 

Finley chop the dates and prunes and soak in hot tea for about 10 minutes

Cream the butter and sugar

Slowly add to the mix your syrup, bicarb, eggs and fruit as well the flour, folded in a spoonful at a time. At this stage, I divided the mixture into two, one-half for the competition and the other half for my mother’s birthday cake. 

To this second batch, I also added 50g walnuts. 


Bake in the oven for 55 minutes (maybe longer depending on the size of the tin) or until it brings back and an inserted skewer comes out clean.

Saturday, 21 June 2014

That time I made coconutty chocolate

This day has been a long time coming as I have spent the last few months trawling though supermarkets, markets and health food shops alike in the quest to find one key ingredient: coconut milk powder.

When making chocolate at home my preferred method is to use ground cacao liquor. This raw ingredient, often also called cacao mass is the direct result of grinding down the cacao nibs and thus contains raw cacao powder and raw cacao butter. The raw cacao (unlike processed cocoa) contains an abundance of minerals and health benefits such as:


Cacao is also a good source of both sulphur and magnesium, probably why we women crave chocolate during our periods!

Rather than having me preach on at you about the benefits of eating raw cacao take a look here for a more in depth look at this superfood. Now dont tell me that chocolate is not good for me

To make dark chocolate we would require to grind our liquor, conch and temper before putting into moulds to set. Yes it really is that simple! Yet I find that dark chocolate is sometimes too rich and bitter for some people (absolute poppycock if you ask me as plain/dark chocolate is pretty much just pure chocolate and what is the point of eating chocolate at all if you are just going to pile on extra ingredients and dilute the flavour.)  well each to their own.

For making milk chocolate do not just add milk as this will change the consistency and increase the fat content instead you should use milk powder. I had a look to see what the dairy free options for raw chocolate were ( personally I eat dairy but my sister and mother would rather substitute dairy in their diets) and well let's just say there wasn't exactly that much option if you wanted a dairy free milk chocolate bar and if there was it didn't taste all that great. I therefore decided to make my own with coconut milk hence the quest to find coconut milk powder.


The first thing you want to is to grind your cube of cocoa liquor into powdered form.


 Now comes the maths bit.

I have 37g of cacao liquor and will be wanting the same quantity of the milk powder.

37 +37=74

74g=100g right?

Well not quite as to make the chocolate more palatable I needed to add sugar and fat. I therefore worked from the equation:74/80 x 100 = x

This would mean that 100% would be 92.5g and subsequently that my sugar and fat content would be 18.5g therefore 9.25g each…well 9g getting into decimals of sugar is quite hard.

Ok maths over you can come back now.

The next stage on our homemade chocolate challenge is to conch our chocolate. I do not however have a large conching machine that you see at most chocolatiers but I have found that a heated up pestle and mortar does the trick nicely.

Heat your pestle or is it the mortar? The bowl bit anyway in the oven for about 20 minutes. I put the stick bit in as well and ended up having the conch with an oven cloth wrapped around both the pestle and mortar. Not ideal.

Put in all the cacao and grind for about two minutes before removing, adding coconut oil and truvia (sugar from the stevia root)  and replacing into the bowl for more grinding. Conching your chocolate helps to purify acidic compounds and improve the flavour so there are no guidelines for how long to conch your chocolate.


Once happy with your now smooth melted chocolate add the milk powder gradually. I started to panic at this stage as my chocolate looked to be clumping and was similar in texture to burnt chocolate. Luckily I learnt that the milk powder that I was using was just quite coarse and it was this that was affecting the chocolate and I hadn't in fact burnt anything. Panic over.

Temper the chocolate. There a few ways you can do this including a process called 'seeding' for this you melt your chocolate and then stir in commercial chocolate. Yet this would 'contaminate' the chocolate you had made so I prefer the 'tabling' method:

 Pour out the chocolate onto a flat, smooth surface such as marble or a non porous chopping board. With a pastry slice work the melted chocolate quickly around the board. The reason that we temper chocolate is to stop it from solidifying in an unstable form, through tempering solid fat crystals have more of chance to form from its molecules meaning that we end up with a chocolate with a better shine but also longer shelf life.


Place your chocolate in a mould and sprinkle on roasted cashew nuts (optional) before placing your chocolate to set in the fridge for about an hour.


Saturday, 22 March 2014

What to do with a whole coconut aka how many times can you say the word coconut in one blog post

Hello, today (seeing as it is #saturdayisbakingday and you just simply HAVE to bake on a Saturday) I am going to make (or attempt to at least) Cocconut Banana Bread Muffins. The recipe I found uses desiccated coconut but I was going to be using a fresh count instead as this would add more moisture to finished muffin. The first thing to do with the coconut is to de-hair it until you can see three spots in the top that are darker in colour than the rest of the coconut.

Theese three spots are the weakest point of the coconut so with a knife you want to make holes in them. I actually only managed to make one hole because my coconut was very tough.


We make holes in the coconut to allow any of the water to drain out.


To do this turn the coconut upside down on top of a cup (using a plastic cup with balloons on it is optional) and watch as the liquid runs out. For my coconut however no water came out and this was the first sign that something might be wrong. However I ignored these warning signs and carried on regardless.

For the next stage you will require a hammer or failing that a very big stone. Wrap your coconut in a plastic bag, I like to use more than one bag in case one breaks(trust me they will), then proceed to whack the living daylights out of your coconut. If any of your neighbours ask what you are doing  make sure to let them now that it is actually a coconut that you are hitting. 


As I went to remove the white inside from the husky exterior I was overcome by the most foul, awful smell but I thought maybe that was from the bag that I had placed on the floor when I was hitting my coconut outside yet the smell wasn't going away even after I had rinsed it. I cautiously cut a piece of my coconut and tried it yet I spat out the contents of my mouth shortly after as it turned out that my poor coconut was in fact very much rotton. 

After this set back I was forced to go back to the drawing board yet fear not as I did have some desicated coconut stashed in my baking cupboard so the show could still go on. 

Here is the recipe I was going to be 'following' although I use the term 'following' very loosely as I would be changing things up a bit. For my revised edition of these muffins I used:

  • 150g desicated coconut 
  • 150g plain flour
  • 1 tsp baking powder
  • a pinch of salt 
  • 100g coconut oil
  • 60g truvia
  • 45g agave nectar
  • 5 mashed bananas
  • 60g poppy seeds 
 By using cocnut oil instead of butter and a truvia/agave nectar mix instead of sugar I was eliminating the use of saturated fats and refined sugars meaning that my muffins will taste lighter and less 'stodgy'.
  • Preheat the oven to 180 celcius or 350 farenheit
  • Combine all of the dry ingredients in a bowl and place to one side. 
  • Meanwhile melt the coconut oil before creaming with the truvia before adding the agave nectar.  
  • Mash those nanas and whisk the eggs
  • Add the dry mixture little by little folding all the while to get as much air in the mixture as possible. 
  • Bake for 25 minutes or until golden. A hint for knowing when the cakes are done is that if you stick a skewer/knife in the centre it comes out clean.

Alternatively this recipe would work well as a loaf cake perfect with a cup of tea...and on that note I think its time for a cuppa 


Friday, 17 January 2014

Carrot cupcake fail


My adventures in baking have often led me to trying out substitutes to the traditional ingredients such as using different types of flours (einkorn,spelt, gluten free etc) or dates instead of butter. 

This time the main ingredient that I was replacing was sugar but seeing as I was replacing one thing I thought that I might as well go the whole hog so my dear readers I present to you; 

Sugar free, gluten free, saturated-fat free carrot and pecan cupcakes. 

Well they would have been if I hadn't had the urge to ice them. 

The recipe I used can be found here. Only I used wheat free flour instead of almond.
http://eatthecookie.wordpress.com/2012/02/19/carrot-cake-cupcakes/

My mother made a stir fry last week (bare with me this story does relate) and instead of using rice like normal people would she decided that it would be far more nutritional to use shredded cauliflower. Alas (and I have no idea why...) a lot of this cauliflower did not get eaten so it was banished to the depths of the fridge. 

There it lay slowly festering and seeping into the other foods and quite frankly stinking to high heaven. Remember this little tale because we shall be deviating it in a few paragraphs time.  

For the icing I made a simple cream cheese butter icing using golden icing sugar. The golden sugar in this icing gives off a slightly caramel flavour and your icing will be lightly golden. 

I first mixed the icing sugar in with melted butter to make a smooth butter icing before adding a table spoonful of cream cheese -  does something smell a bit funky to you? 

 As it turned out the cream cheese had fallen victim to the great cauliflower invasion  yet I didn't realise that this was the case until  after I had already decorated the cupcakes. 

Anyone for a carrot cupcake with cauliflower icing? 


Saturday, 30 March 2013

The gummy fail


I stumbled across a recipe for homemade gummy bears and I if I were to say that this didn’t tickle my pickle I would lying (eww guys that’s gross). The recipe that I (tried) to follow can be seen here: http://undressedskeleton.tumblr.com/post/42764785751

I tried to follow the recipe but I had no lime juice or orange juice or mangosteen juice or stevia on the raw or even most of the fruits that were used. So I improvised….recipes are for wimps anyway. Famous last words

Hence the use of guava juice, apricots and even a little bit of grenadine and the new flavours of gummy bears were born: Apricot, Orange and Banana and Very Berry. 


Another a really large, gaping problem was that I did not have a bear moulds,  a bear shaped cutter  or even any cutter small enough so even this had to be improvised upon. I did however have a selection of farmyard animal moulds so the ‘bears’ now turned into gummy animals of some description (and hearts). 

Although the gummy things will turn out rather larger than what I been hoping for, they are going to be more like jelly babies than gummy bears. Oh well, In the words of Beyonce: ‘ I don’t think you’re ready for this jelly. 

Alas what I had been hoping for did not happen as when I put the  gummy in the moulds it did not come out.


When heavily greased the shapes did come out but.... this one was supposed to be a duck


Basically the only thing I have been able to achieve this morning is a big ball of goo. It's like Flubber except for the fact that it doesn't bounce or dance or even play the maracas 


After a lot of patience and a whole lot more trial and error I was finally able to create at least some gummy things out of the apricot, orange and banana batch (although I realised soon after it had set that this flavour was not all that pleasant)

It did however require me to grease each little mould before using it every single time. I also learnt that moulds with anything fiddly were a no no so little lambs, bunnies, chicks and anything else vaguely Easter related were out of the question. Gummy blobs are therefore the dish of the day.

The very berry gummy/jelly has still not set (4 hours later) this is probably due to the fact that this batch has a lot more liquid in the mixture than the last one, although I did boil this batch for longer. So I will just have to sit tight and wait to be able to fail all over again. In the meantime I'm making raspberry shortbread.