Showing posts with label tea. Show all posts

Tuesday, 14 July 2015

Bubbleology- The science of bubble tea

Trends in food and drink are fast paced and ever changing for example the cupcake craze or the time when everybody went sushi mad. The latest wave to hit British shores is bubble tea.


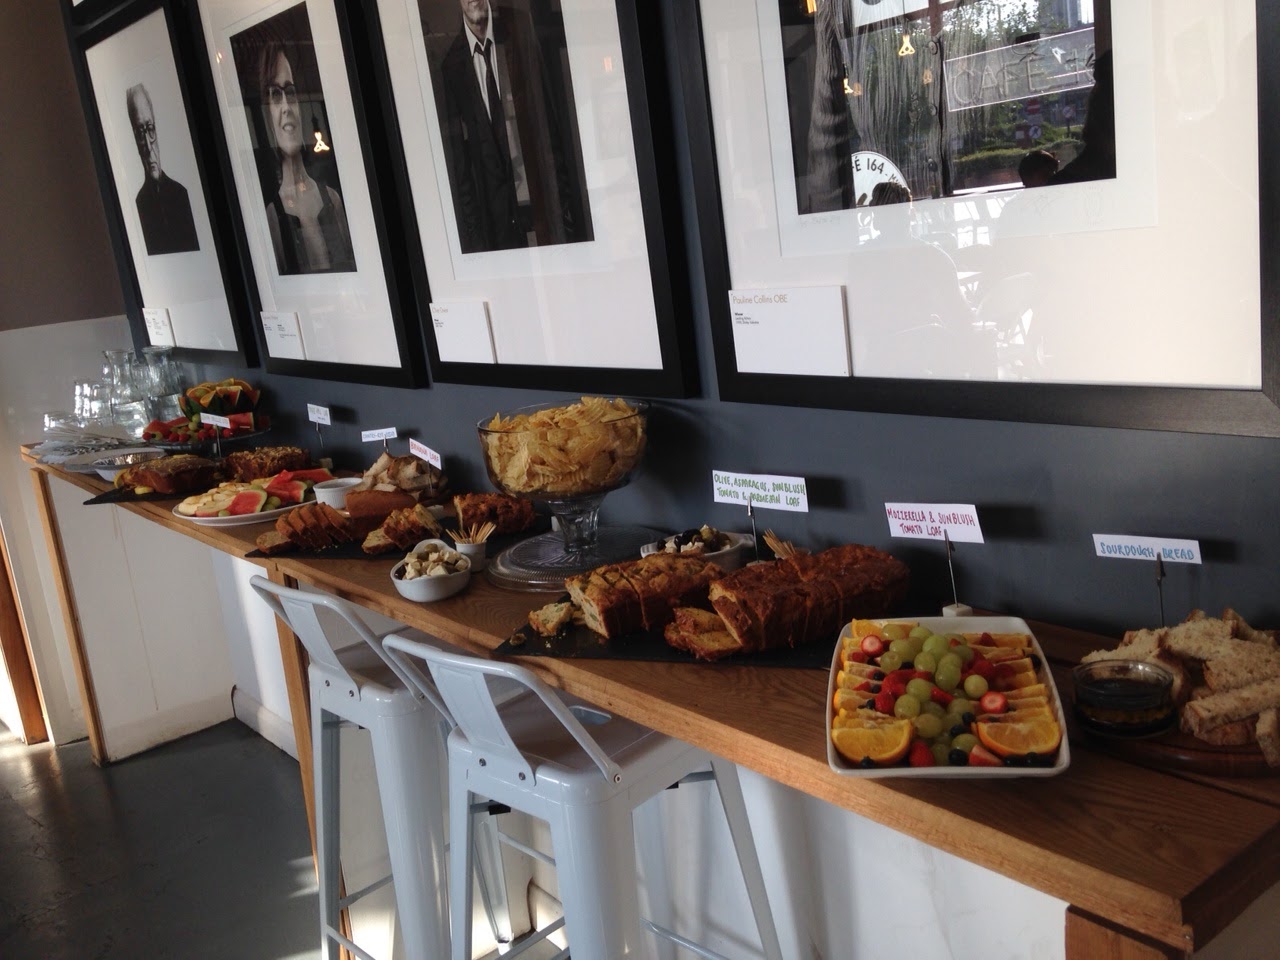
The blogger event tonight (14th July) was held at Cafe 164 and in addition to the tea there was a delicious array of breads and cakes on offer that are all made in the cafe itself. Some of our favourites included the mozzarella and sun blush tomato loaf, the olive, asparagus, sun blush tomato and parmesan loaf, toffee apple cake and the lemon drizzle. Who am I kidding, all of the food was divine! If you find yourself down by Munro House on Duke Street in Leeds you should definitely check it out. :)

Bubble tea was first invented in Taiwan in the 1980s and refers to a refreshing tea based drink with chewy tapioca balls  that you suck up through a large straw. The balls are sometimes referred to as 'pearls' or 'boba' and over time 'boba' became 'bubble' hence the name.

However a very westernised addition to the traditional bubble tea is what is known as popping boba. These multicoloured bubbles composed of fruit syrup enrobed in a seaweed case burst in your mouth. It's a very weird (in a good way) sensation.


Bubbleology are based in London and have only recently opened a new store in the Trinity centre, where I am told they are making quite the impression as bubble tea not only looks great but also tastes fantastic.  The vast variety of fruit syrups allows you to make your own custom drink and is a fun brew and snack in one!

The art of making bubble tea is a precise science that involves adding hot tea (Bubbleology used Jasmine Green tea in our drinks) to cold fruit syrups (of your choice) and shaking vigourously to cool the tea down before adding the boba and/or tapioca and finally sealing the cup. Our bubble tea was served cold (somewhat like ice tea) and is therefore a perfect summer drink, yet you can also get milk based bubble teas that are similar to milkshakes and even hot bubble teas that are highly in demand during the winter months.


Saturday, 6 June 2015

Hibiscus tea and poppy seed shortbread

Shortbread is super simple and tasty biscuit to make and its a great recipe to make with kids of any age - yes even I can just about manage this one.

Hibiscus tea has a huge variety of health benefits, not least that it helps lower lower blood pressure and stops you from having nose bleeds (which led me to discovering this tea in the first place.) to find out more about the health benefits of Hibiscus tea click here 
I buy my hibiscus tea tea here 

I used the simple BBC recipe of:
125g butter
55g sugar
180g flour

Additional ingredients that I used are:          2-3 tbsp of hibiscus loose leaf tea
     25g poppy seeds

When I first decided to make tea infused baked goods I wondered how I was even going to do so without the mixture being very runny; the key I have found is to make a tea infused butter. This should normally be made a few hours before you make your shortbread or even the night before.

The shortbread recipe requires 125g butter yet for the infusion stage I would advise that you use a little extra. Therefore I added 150g of butter to a pan and melted it. As the melted butter comes to the boil remove from the heat and add 2-3 tbsp of hibiscus tea depending on how strong you want the flavours to be.  Leave to steep for about fives minutes and then strain the tea. Use a spoon to make sure that you get as much of the butter out of the tea leaves.

Once cooled move the butter into a small container and put it into the fridge to set.

yay the infused butter set- or as my dad likes to refer to it: a culture with bacteria


Place the sugar and flour in a bowl and rub in the butter much like you would do with a crumb;e/ However unlike a crumble the crumb doesn't need to be that fine you just want to make sure that the butter is evenly mixed in.


At this stage add the poppy seeds and bring the mixture together to form a smooth dough. You shouldn't need any liquid to do this but a dash of water or indeed hibiscus tea may be required if your mixture is very dry.

As with most biscuit doughs, shortbread works best if it is left to rest therefore put your dough in a freezer bag or wrap it up in some cling film and place in the fridge for half an hour.

Now would be a good time to preheat your oven to 190 degrees c and line a baking tray with greaseproof paper.

After it has rested a while take out your dough and using plenty of flour to dust the work surface and rolling pin roll out your dough to about a 2cm thickness. I cut mine out into rounds but you can use whatever shape that you like or stick to the traditional shapes such as fingers.


Bake in the oven for 10-12 minutes or until golden depending on the size and thickness of your biscuits. Leave to cool completely before removing from the sheet of greaseproof paper and demolishing your biscuits with a cup of (hibiscus) tea. 


Sunday, 17 May 2015

Macaroons for World Baking Day

Happy World Baking Day one and all! There can be only one form of activity on a day like today and as you've probably already guessed by the title or even just by clicking onto this page: today we are baking.

I will be making macaroons and I'm hoping that they will actually work this time as all previous attempts, despite being delicious, did not quite go to plan. My last batch were not cooked for long enough and were therefore very soggy.

Nevertheless, today it's going to work out…right?

The recipe I am using comes from Lorraine Pascale but I (obviously) had to make some changes.


The ingredients list for the recipe was:


  • 125g/4½oz icing sugar
  • 125g/4½oz ground almonds
  • 90g/3½oz free-range egg whites
  • 2 tbsp water
  • 110g/4oz caster sugar
  • food colouring (optional)
  • desiccated coconut, for sprinkling (optional)
  • 150ml/5fl oz double or whipped cream whipped
  • 100ml water
  • 2tbsp honeybush tea leaves
  • 200ml custard


oh look conjoined twins


But I ignored the last three and instead used:
I was going to make standard vanilla macaroons but then I thought nah lets make my life more complicated so I went for a Honeybush tea infused option. You can find the tea here! 

When making macaroons you have three key elements: the almond/icing sugar paste, the whisked egg whites and the sugar syrup. It is the latter in which we will be using the tea.

In a pan boil the water and add 2 tbsp of tea leaves. Any tea should be fine and I might try this recipe with some green tea next time. Brew for 5 minutes before staring the tea leaves and putting your infusion back on the boil. 


To this pan add 110g sugar and let it thicken to a syrup. I haven't got a sugar thermometer but if you are using one the temperature should reach 115 Celsius.

Set aside to cool.

In a bowl measure out 125g each of icing sugar and ground almonds. Add 40g of egg white - if you not cool enough to stand around weighing egg whites this equates to roughly one medium sized egg. Stir to a thick paste. 


Whisk the remaining egg whites to medium/stiff peaks. Luckily I have a  Kenwood to do the hard work  for me :) 


Gradually pour in a quarter of the cooled sugar/tea syrup and continue whisking until shiny and smooth.

Fold the almond paste into the egg whites and if you are wanting to use any colouring for your macaroons this where you would add them in.

To form the macaroons you will need to line a baking tray…or two…actually make that three and pipe your mixture on in little circles of roughly the same size. If, however, your piping skills leave a lot to be desired you 
can spoon the mixture onto the trays. Yet this method may result in your macaroons being a lot flatter than the ones that you normally see being sold in the shops.

Leave your macaroons to stand for half an hour before baking. This allows the macaroons to form a skin. Alternatively you can place an additional sheet of grease proof paper over the tray after 10 minutes of cooking in the oven for a similar effect.


Whilst you are waiting for your macaroons you could make a start on the filling, read another one of my blog posts or maybe make some cupcakes? All of the above is also a good option.

 Preheat the oven to 170 Celsius and once ready, bake the macaroons for 12-15 minutes or until they are 
starting to golden. Timing is crucial for when making macaroons (much like tuilles - lol that was fun *sarcastic face*) as if they undercooked they will be too soggy and unusable.

Leave the macaroons to cool and harden whilst you turn your attention to the filling.

I cheated on this bit as we had ready made custard in the fridge already (well it was reduced to 29p)

Pour the custard in a pan with the rest of the tea syrup and bring to the boil. Wow that was simple.

Sandwich two pieces of your macaroons together with a blob of filling in between. If any go wrong…eat them :)

Macaroons can be kept in the fridge for up to a week or even frozen for three months. If you are freezing them though take your macaroons out an hour before eating them so that they have sufficient time to defrost.

Saturday, 22 March 2014

What to do with a whole coconut aka how many times can you say the word coconut in one blog post

Hello, today (seeing as it is #saturdayisbakingday and you just simply HAVE to bake on a Saturday) I am going to make (or attempt to at least) Cocconut Banana Bread Muffins. The recipe I found uses desiccated coconut but I was going to be using a fresh count instead as this would add more moisture to finished muffin. The first thing to do with the coconut is to de-hair it until you can see three spots in the top that are darker in colour than the rest of the coconut.

Theese three spots are the weakest point of the coconut so with a knife you want to make holes in them. I actually only managed to make one hole because my coconut was very tough.


We make holes in the coconut to allow any of the water to drain out.


To do this turn the coconut upside down on top of a cup (using a plastic cup with balloons on it is optional) and watch as the liquid runs out. For my coconut however no water came out and this was the first sign that something might be wrong. However I ignored these warning signs and carried on regardless.

For the next stage you will require a hammer or failing that a very big stone. Wrap your coconut in a plastic bag, I like to use more than one bag in case one breaks(trust me they will), then proceed to whack the living daylights out of your coconut. If any of your neighbours ask what you are doing  make sure to let them now that it is actually a coconut that you are hitting. 


As I went to remove the white inside from the husky exterior I was overcome by the most foul, awful smell but I thought maybe that was from the bag that I had placed on the floor when I was hitting my coconut outside yet the smell wasn't going away even after I had rinsed it. I cautiously cut a piece of my coconut and tried it yet I spat out the contents of my mouth shortly after as it turned out that my poor coconut was in fact very much rotton. 

After this set back I was forced to go back to the drawing board yet fear not as I did have some desicated coconut stashed in my baking cupboard so the show could still go on. 

Here is the recipe I was going to be 'following' although I use the term 'following' very loosely as I would be changing things up a bit. For my revised edition of these muffins I used:

  • 150g desicated coconut 
  • 150g plain flour
  • 1 tsp baking powder
  • a pinch of salt 
  • 100g coconut oil
  • 60g truvia
  • 45g agave nectar
  • 5 mashed bananas
  • 60g poppy seeds 
 By using cocnut oil instead of butter and a truvia/agave nectar mix instead of sugar I was eliminating the use of saturated fats and refined sugars meaning that my muffins will taste lighter and less 'stodgy'.
  • Preheat the oven to 180 celcius or 350 farenheit
  • Combine all of the dry ingredients in a bowl and place to one side. 
  • Meanwhile melt the coconut oil before creaming with the truvia before adding the agave nectar.  
  • Mash those nanas and whisk the eggs
  • Add the dry mixture little by little folding all the while to get as much air in the mixture as possible. 
  • Bake for 25 minutes or until golden. A hint for knowing when the cakes are done is that if you stick a skewer/knife in the centre it comes out clean.

Alternatively this recipe would work well as a loaf cake perfect with a cup of tea...and on that note I think its time for a cuppa 


Thursday, 3 January 2013

Of all the tea in China, so I made cupcakes


If anyone has ever had the pleasure, nay the privilege, of entering my humble abode you will know that is filled with an array of different teas. Whether it is colour, flavour, type or the country of origin I can pretty much guarantee that I have that tea. 

According to the Chinese Historical and Cultural Project tea “is today’s most popular beverage in the world,[1]” since its introduction to Europe in the seventeenth century tea was seen to be a very expensive product and tea smuggling was rife especially amongst those who could not afford the product that was worth its weight in gold. It seemed like nobody could keep their hands off the stuff but why only drink it when the tea can be used for so much more?

When first trying out a recipe I have been advised to stick to it and adapt it later on when you know that it works, well I’m throwing caution to the wind and the song goes ‘It’s my party and I’ll cry if I want to.’ I probably will cry if it goes wrong.

The original recipe can be found here: http://www.lowfatvegancooking.org/?p=2213
 
My version is as follows:

Ingredients:

3 tsp green tea leaves  I used Bancha Arashiyama a Japanese Green Tea  available from the Tea House Emporium without additional flavours added to it but I wonder if using a different type of tea, maybe a more flavoursome variety would change taste of the cupcake.

400ml Almond milk 

60g Almond butter

Or alternatively 475ml of milk and no butter, I used Almond because we had some in the house but regular milk and/or butter can be used instead, unless you are vegan, then I would suggest a milk/butter of the nut variety 

160g Whole grain flour, you could use white flour but it tastes more refined and contains less fibre.

1 tsp Baking Powder

¼ tsp salt

150g sugar


Boil the milk with the tea leaves for 10 minutes allowing the leaves to infuse the milk. Strain, making sure to get as much of the liquid out of the leaves as possible.

Cream the sugar and butter (if using butter, if not then this a pretty useless step to have) 

Add the vanilla extract and ¾ of the milk mixture to the sugar as well as folding in the rest of the dry ingredients.

Bake in the oven at 180°c for 25-30 minutes
.
To make the icing, don’t do as I do and pour the icing sugar into the green tea milk, it will never thicken. Instead mix a tsp of vanilla and a tsp. of almond extract with 150g icing sugar and gradually add the green tea milk.

To go with my almond theme (almond milk and almond butter) I decided to put marzipan rounds on top of each cupcake before icing, it also added a different texture to the finished cupcake. I didn’t add the marzipan rounds because I had loads of marzipan left over from making Christmas cake and needed to find a use for it, of course not.


[1] CHCP, Teas Wonderful History (online) available from: http://www.chcp.org/tea.html